Last Updated on April 14, 2023 by Lisa Vargas
One of the most frequent questions I get regarding prepping and survival is how to build a bug out bag. Especially when people are new to survival, they feel like this is the first task they need to tackle.
I do want to emphasize that no amount of gear and gadgets with help you survive without knowledge on how to use that gear. These days learning about survival is typically free. I learned about 90% of what I know regarding survival by watching free videos and reading free articles online.
Knowledge should always be your top priority. Your gear might break, get lost, or be stolen, but you will always have your knowledge and experience upon which to rely.
That being said, having the right gear with you is a huge advantage. In this article, I will cover the most useful items to include in your bug out bag list and why you might need them. Without some guidance, it is easy to buy cheap gear that will break the first time you use it. It also easy to end up with a bunch of items that you really do not need.
If you follow this guide, I can promise you will put together a more effective and efficient bug out bag list.
However, it will be your responsibility to take the next step. Be sure to research the highest quality items so you know they will last. When you purchase gear, you should always take it out of the package and get some practice with the item before adding it to your pack.
If it is not exactly what you need, replace it. When you are finished, you should be familiar with every single item in your bug out bag and how it should be used. If you follow this article and take these additional steps, you be significantly more prepared when your life depends on it.
What Is A Bug Out Bag?
Well, lets start at the beginning. You may need to know what a bug out bag is and why you need one. It is actually one of the most searched subjects you will find on survival and prepping sites. A bug out bag is simply a pack strategically loaded with gear that you would need to “bug out”. Bugging out is the action of leaving your home either by vehicle or on foot because your home is no longer safe.
There are times that staying in your home is the safest move. In fact, most of the survival scenarios you may face dictate that you stay home. Home is where you keep the largest amount of supplies like food, drinking water, and survival tools. In most cases, you want to stay with all of your stuff in a warm, dry shelter. Staying home in a survival scenario is considered “bugging in”.
However, leaving your home to “bug out” to a more secure location may be your best bet. If you home is severely damaged by flooding or another natural disaster, you may be bugging out. If there is a dangerous group of people looting or acting in a violent manor in your area, leaving may be best.
If there is an issue limited to a specific geographic area such as disease, wildfires, hurricanes, or nuclear fallout, leaving may make more sense. Sometimes you need to just leave the city in which you live. Sometimes you need to relocate to a more remote location or the home of family or friends. Sometimes you just need to get away from other people completely. This is when you could find yourself bugging out.
Your bug out bag should be built considering the worst-case scenario. Often roads are damaged or blocked to the point that travelling by vehicle is not an option. Your bug out bag should be built assuming that you are on foot. This means you must consider the size and weight of the pack you will be carrying.
As for how long your bug out bag should last you, the best answer is indefinitely. In a perfect world you could walk into the wilderness with just your bug out bag and come out fine several months later. The reality is that you probably will only need your bug out bag for a few days or maybe a couple weeks. Statistics show that most disasters are primarily resolved within a few weeks. However, this is not a guarantee. You are better to be prepared for anything.
Bug Out Bag List
Chances are, this is what you are really wanting us to cover. Please remember that everything we have covered above is as important if not more important than the list of gear itself. This list should vary from person to person based on your needs and skills.
Please do not save this list and then just buy the list. I want you to think about each and every item and how it affects your needs. These items will be categorized by purpose and prioritized with the first items being the most important.
Self-Defense

There are several small items that fit well inside a bug out bag. Here are some suggestions:
- Pepper Spray – a good pepper spray can go a long way when trying to get away from an attacker. Below is a few of our recommended pepper sprays:
- Handgun – If you have a handgun, make sure to have some ammunition to go with it. With handguns and ammunitions in such high demand right now, you will want to constantly be stocking up.
- SurvivalKnife – A quality knife is the single most important tool you can have in a survival scenario. It is almost impossible to fashion a sharp, strong blade using natural materials. I would suggest a fixed blade full tang knife with a blade between three and ten inches long tip to handle. Below are a few options for survival knives:
This is the most reliable type of knife with a blade size that can handle detailed work like cleaning small game and tougher work like batoning firewood. Pay close attention to the steel type as some will hold an edge much better than others.
Survival Tools
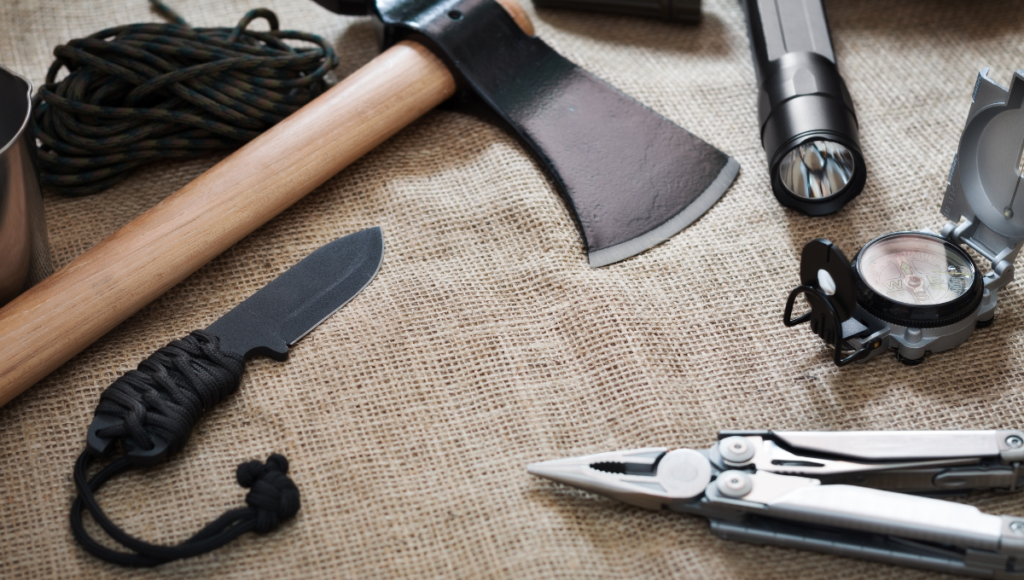
You will need a few reliable survival tools to help you get out of sticky situations or for building and constructing shelter perhaps along the way. Remember to keep things as light as possible. Here’s a few examples of survival tools that are good for your bugout bag:
- Cordage – I suggest using 550 paracord. It is thin but can hold 550 lbs. of weight. It can also be split apart to use the internals strands, so 10 feet of paracord can actually equate to about 80 feet of total cordage. Replace your boot laces, wear a paracord lanyard, or just keep a spool in your pack. Places to buy 550 paracord are listed below.
- Survival multi-tool – there are several variations of these survival multi-tools that come in extremely handy. They are always a smart idea and you shouldn’t forget a reliable multi-tool for your bug out bag. Here are some of our recommendations:
- Wood cutting tools – I always carry a folding saw in my pack. It is only eight inches long when folded, but I can cut wood up to about four inches in diameter. You can also take a pocket chainsaw, a frame saw, a bush axe, or a hatchet if you prefer.
- Backup knife – Having a functional knife is so important, I typically take two or three just to be sure I always have one. Usually my backup knife is a high-quality folding blade knife.
- Sharpener – You have enough sharp metal tools in your bag that they will eventually get dull.
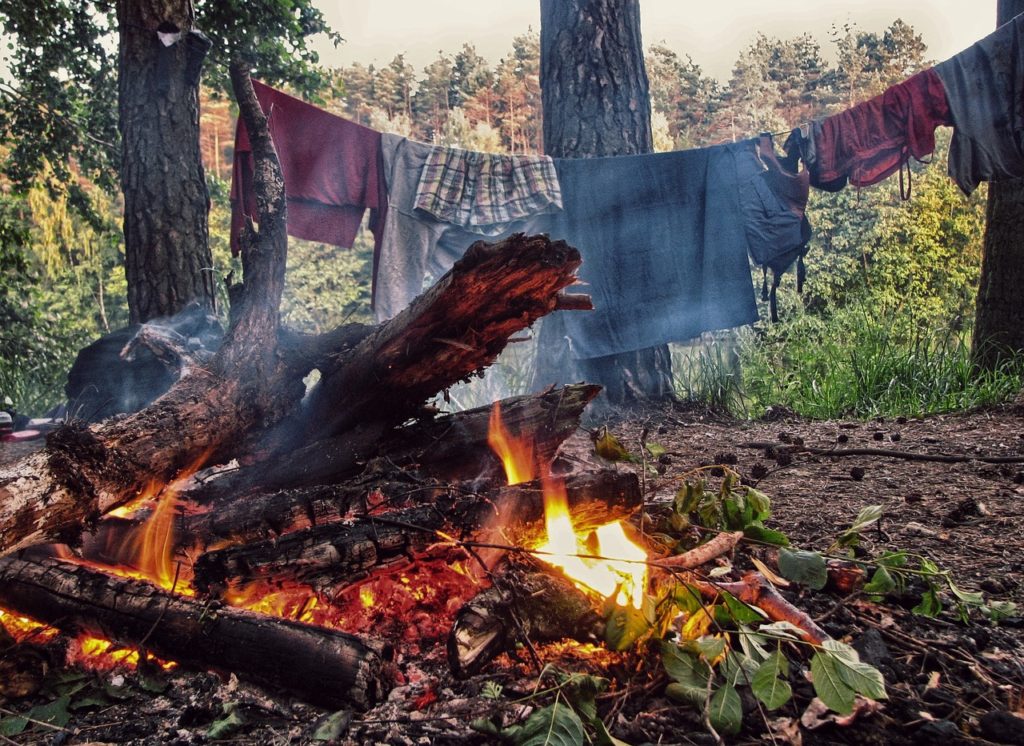
Fire
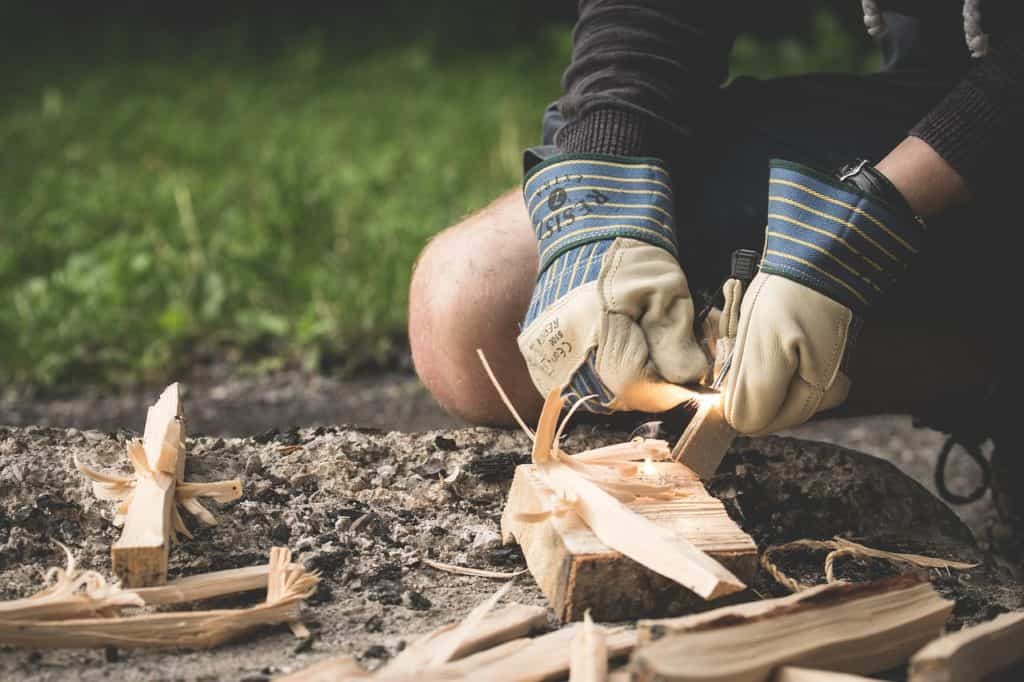
You should always have several ways to start fire in any conditions.
- Ferro Rod – This fire starter is windproof, waterproof, requires no fuel, and shoots out sparks at around 3000F. I usually have several in my pack.
- Zippo Style Lighter – These lighters are windproof, reliable, and can be refilled with any flammable liquid.
- Bic Style Lighters – These are cheap but very reliable. I keep several in my bag.
- Waterproof Tinder – This could be any material that will stay lit in wind and rain. You can buy Wetfire cubes or Firestix. You can also make this from materials at home.
- Pocket Stove – You can buy pocket stoves that work with natural materials. I prefer a pocket stove that takes a small can of gas. It is great to boil water quickly or cook a fast meal. Definitely Optional.
Water & Filtration
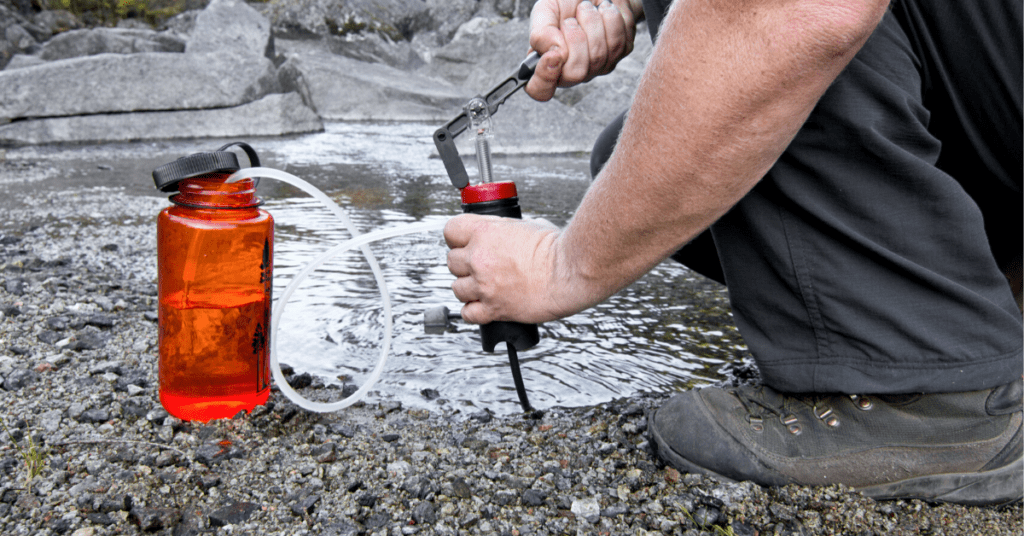
You will need to have purified drinking water within three days to survive. If you want to be at optimal performance, you will need a gallon or more per day depending on the heat and physical activity.
- Water Filter – These all eliminate 99.999% of harmful pathogens from found water. I like to keep a filter bottle handy because I can carry water with me. You can also use a straw style filter which takes up less space but requires you to drink at the source. Here are a few water filters we recommend:
- Purification Tablets – These are typically iodine tablets and will purify water if you let them dissolve for about 30 minutes. They are a great backup plan in case a filter gets clogged.
- Bottled Water – We would love to just keep a bunch of water in our bug out bags, but it is heavy and takes up space. I normally keep one or two small bottles of water in my pack. You can also choose the survival water packs if you would like. Links to survival water packs below:
Shelter
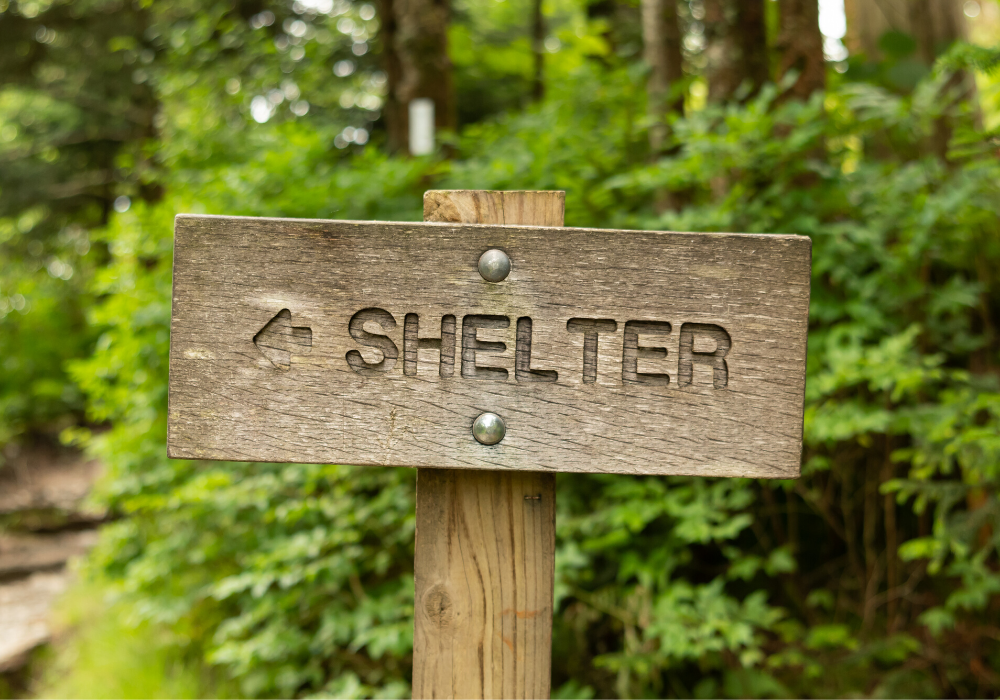
If it is cold or raining, you will need to have shelter within the first three hours. For our purposes, shelter will include anything that keeps you protected from the cold. In addition, sleep is one of the most underrated priorities for survival. These items will give you the best chance of getting some sleep so you can stay functional the next day.
- Emergency Blanket – This is a waterproof blanket with a reflective coating which reflects 90% of your body heat back to you. There are disposable space blankets that take up little space and also bigger, tarp-style blankets that are much tougher. They can be used to just wrap up, or you can make a shelter with the blanket.
- Sleeping Bag/Bivy Sack – Being able to wrap up in something to keep you warm is helpful. While I would consider this an optional item, it would make for a warmer night if you have room.
- Sleeping mat – There are thin foam mats and inflatable mats that will help insulate your body heat from the ground. They also give you a little padding to help you sleep. This is optional as you can make a bed with natural materials.
- Hiking tent – Definitely optional. These are small and light enough that it might make sense to include it. They are a bit over a foot long, a few inches wide, and just a few pounds. If you are dead tired after hiking all day, this would set up in a few minutes and block the wind and rain.
- Hammock – Also very optional. In the warmer months, a hammock can give you a comfortable way to sleep without being on the ground. If it rains, you can rig up your emergency blanket as a roof to shed the rain.
- Inflatable pillow – For my pack this is a must. I have neck and shoulder problems and need some neck support to sleep. I could just use my pack, but this pillow is a few ounces and a few inches across when deflated. For most people this should be optional.
Food
For this category we will cover food itself as well as items that can help you acquire food.
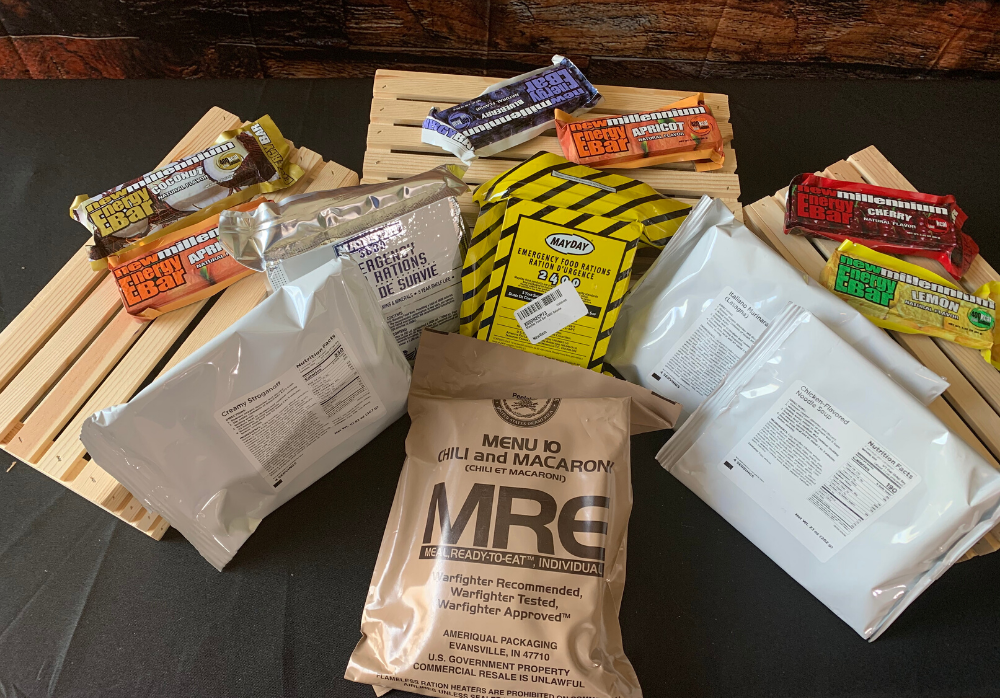
- Meal replacement bars – While you can survive three weeks without food, starvation starts affecting you within a few days. I suggest a few of these just for those rough times when you need calories and don’t have the time or energy to trap, fish, or forage. They are small and lightweight.
- MREs and Food Ration Bars – These are good options that you can quickly add to your bugout bag. Be careful not to add to many ration bars because they are very heavy and you want to keep your pack as light as possible if you’re travelling on foot. Here are some places to get MREs and Food Ration Bars:
- Fishing gear – While it does not make sense to bring your full fishing rod and tackle box, there are more practical options. I like to keep a Pocket Fisherman in my bug out bag. This is a folding fishing rod that is only nine inches long when folded. I have easily hauled in five-pound bass on this little rig. You can also put together a pocket fishing kit with hooks, line, lures, sinkers, and floats. Fishing is one of the easier ways to get protein if you know what you are doing.
- Snares/Wire – If you know how to build snare traps, you can bring manufactured snares or you can just bring a spool of wire and make your own. With some knowledge, this is a good way to get food.
- Food Preparation Tools – It would be smart to have some tools that you can use to eat your food with , place your food on, as well as boil water when needed. Below you will find some recommended options:
- Spork
- JetBoil
- Portable Stove
- Fuel Tablets for portable stove
- Can Opener
Clothing
Most of the clothing in your pack will rotate based on the season. In cold weather I have items like an insulated hat, a jacket, and warm pants. However, the following items are a must year-round.
- Gloves – You should always have some sort of tough gloves in your pack. This is more for protecting your hands while working than it is for warmth, but they work for both. I use fingerless tactical gloves and they work great.
- Socks– When hiking long distances, having an extra pair of dry wool socks is necessary to prevent blisters and swamp foot.
- Underwear – As you sweat from hiking you will likely start to chafe, and a dry pair of underwear can stop the damage.
- Camping towel – These are very compact and super absorbent so you can dry off if you get wet. They dry quickly as well.
- Shemagh – This is a large bandana that is useful for dozens of survival purposes.
Lighting
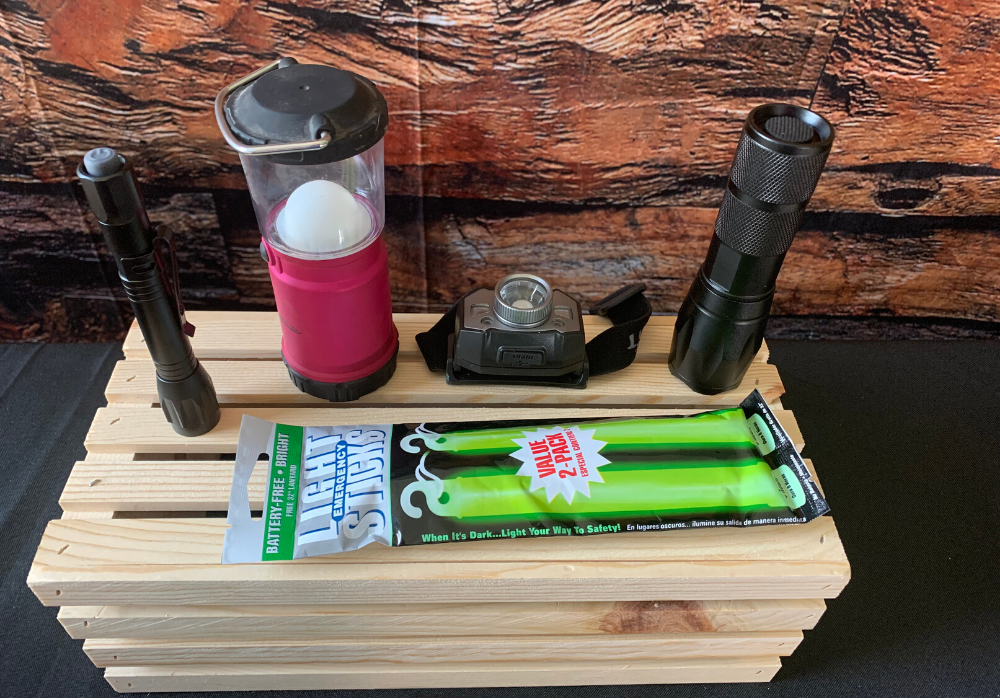
While you can get by without a light, it becomes very difficult to do anything safely after dark.
- Flashlight/Headlamp – You can get a small, tough LED flashlight that will cover most of your lighting needs. You can also get a headlamp that allows you to keep your hands free for other tasks. I often keep both in my pack.
- Lantern/Glow sticks – This is optional, but it is sometimes helpful to have additional lighting for your camp. Either of these options can help you function in camp after dark.
Other Mandatory Items
In addition to the items we have covered, there are several other items I consider a requirement for a good bug out bag.
- First Aid Kit – You can buy a small kit or you can make your own, but be sure it has the items you feel will be most needed. I like to always have bandages, gauze, medical tape, butterfly bandages, antibiotic ointment, allergy medication, prescriptions, and something to help with a fever. You can also include items like a suture kit or quick clot if you like.
- Map and Compass – For navigation you should always have a map of your bug out path and a compass to orient the map. Do not rely upon GPS.
- Signaling gear – This would include items like an emergency whistle and a signal mirror. They will help you alert other people if you are in trouble.
- Duct tape – You know the old saying, if you can’t duct it… then you probably can’t fix it. Duct tape has so many different survival uses, but I keep it handy to wrap around my legs and boots if I need to wade a stream. I can get about three feet deep and my boots will stay dry if I wrap up.
Optional Items
These are items that are entirely based on your personal needs.
- Weapons – You have your knife, but I like to have a secondary option for self-defense. I know people who would bug out with a rifle, some that would take a handgun, and some that would take something non-lethal like a stun gun. It all depends on your level of comfort and how much weight you want to carry.
- Two-way radios – If you are travelling in a group, you may want a way to communicate over short distances when apart.
- Metal Dishes – You can absolutely get by without dishes, but life is easier if you have them. I normally bring a metal cup for cooking and boiling water and a combo fork/spoon. You can bring as much or as little as you like.
How Big Should a Bug Out Bag Be?
When choosing a bag, you need to be realistic on what you can carry. However, you also should buy a bag slightly bigger than what you think you need. You want to have some extra room to add gear if needed. You will want to focus both on the volume of the bag and the amount of weight that you can comfortably carry.
Keep in mind that you may have to carry this bag across long distances. I generally plan on carrying my bug out bag over six to ten miles a day to make decent progress.
Lets talk about volume first. Most packs are rated based on the number of Liters of gear the pack can carry. This will vary anywhere from just a few Liters all the way up to over 100 Liters of space.
These figures only factor in the space inside the compartments of the pack. You can also strap gear onto the outside of your pack if needed. For example, if you plan to carry a sleeping pad or sleeping bag you may want to strap it to the outside of the pack. Most of these packs will have straps on the outside specifically for this purpose.
The trickiest part about volume on your bug out bag is that you will need less and less gear as you become more and more experienced with survival techniques. For example, when you first start you may need to carry a tarp or hiking tent because you are not proficient in building shelters with natural materials.
However, once you are skilled in shelter building you can leave these items out of your pack if you want. I suggest you go a little bigger with your pack initially and then consider dropping to a smaller size down the road. My primary bug out bag is an internal frame pack frame that holds 65 Liters of gear.
This is bigger than I need, but I have a seven-year-old son and a wife with a bad back so I carry some gear for them as well. I have completed survival challenges in which I only took a knife and the clothes on my back, but I would rather have a full pack if I have a choice.
The next consideration is weight. An internal frame pack is going to weigh more than a standard backpack style. That being said, a backpack puts all of the weight on your shoulders. An internal frame pack puts most of the weight on your hips allowing you to comfortably carry more weight.
When completely loaded up, my internal frame pack weighs about 45 lbs. Unless you are in excellent physical condition, this is probably about as heavy as an adult male would want to carry. I’m a big guy, and it is about all I can handle.
I recently completed a long-distance survival challenge on which I had to hike through mountainous terrain with this pack. Considering the terrain, I probably should have gone with less weight to cover more ground.
As a general rule, you want the weight of your bug out bag to be roughly 15-20% of your body weight. This means that a 200 lb. person should be carrying 30-40 lbs. of weight to still cover a good amount of distance. There are exceptions of course. You need to think about your physical limitations.
If you have any injuries or illnesses, you will need to reduce this weight. If you are building a pack for someone that is elderly or for a smaller child, you will need to make adjustments. I have a torn rotator cuff in my left shoulder and a few bad discs in my back, so I should generally keep my pack down to more like 30-35 lbs.
If you want to test your weight capacity, get some weights and a cheap backpack. Load up the amount of weight you think you can carry, strap on your pack, and do some hiking. You should be able to hike several miles of varying terrain with this weight on your back for it to be a good fit. If you feel it is too light or too heavy, adjust the weight and try again until you find your limit.
When you have your ideal pack weight determined, try to relate that to the volume of the pack you may buy. If my 65 Liter pack weighs about 45 lbs. fully loaded, then a 40 Liter pack will likely hold about 30 lbs. of gear. Of course, this will vary based on exactly what gear you bring and what you strap on the outside.
For example, if you bring a gallon of water your pack will be much heavier than if you just bring a water filter and some water purification tablets instead.
My suggestion would be to get an internal frame pack for anything 30 Liters or higher. It is worth the extra weight because of where on your body the weight will rest. Remember, you can always partially fill a big pack but when a small pack is full you are out of options. Always keep your receipt and try out your pack as soon as you get it home.
Do not be afraid of exchanging it for a better fit. You may even want to go into a store to try them on. You do not want to be five miles into your bug out hike and realize you bought the wrong pack.
Biggest Mistakes When Building a Bug Out Bag
There are so many ways to build a bug out bag the wrong way. Here are some of the top offenses:
1. Buying a prepacked bug out bag – If possible, you should never trust someone else to select the gear that may save your life. Often people new to survival are in a hurry to complete their bug out bag as soon as possible. This is a mistake. The odds of you needing your bug out bag this month or even this year are relatively small. Take the time to do it right.
Often companies that sell these prefilled packs use cheap gear to increase their profit margins. The average prepper with buy the bag and throw it in a closet without ever trying the gear, so there is little downside for the manufacturer to go cheap. Picking each piece of survival gear should involve the same scrutiny you put on selecting a new cell phone, a new car, or a new home.
2. Buying gear in bulk – Another common mistake made by preppers is to get online or visit an outdoor supply store and buy all of their gear at once. Bad move. If you buy everything you need at once, I can confidently say that you did not do enough research on each individual item. I generally spend hours if not days researching all of my options before I buy any single item. This will vary a bit depending on the item, but you should take your time on all of them.
Consider your personal needs, read tons of reviews, review the website of the manufacturer, and ask other preppers what they use and how they like it. Even when buying a six-dollar knife sharpener, I considered dozens of options before making a purchase. It is not about the money. That six-dollar piece of gear could save my life.
3. Not testing gear – When you buy gear for your bug out bag, it should not stay in your bug out bag all of the time. When you buy an item, the first thing you should do is try it out. I don’t mean pull it out of the box and take a picture for social media. I mean really try it out. Get out in the woods or in your back yard and run it through the ringer. You should almost be trying to break it.
If there are any issues, you want to know about them before it goes in your bag. I have probably returned or replaced about 25% of the items I have purchased for my bag because they were not a good fit for my needs. This is after all the research that I did before purchase. Sometimes you just don’t know until the item is in your hands for use.
4. Failing to adjust bag contents – When you have your bug out bag “complete”, you are just getting started. A bug out bag is not designed to sit in a closet for years until you are ready to bug out. First, you will have items in your pack that expire. I did not know this when I first built my bug out bag.
I had purchased some Wetfire cubes to help with starting a fire in the rain, and they had been in my bag for about a year. I went out on a springtime survival challenge during which it rained the whole time. Imagine my surprise when my awesome Wetfire cubes would not light because they had expired. That was a cold, wet night. There are several items in my pack that need to be replaced a few times a year to be sure they are effective. I also keep a small amount of dry food in my bag that will sometimes mold over time.
In addition, there are certain items that are ‘seasonal’ for my bug out bag. For example, there are a several additional clothing items that I keep in my pack during the colder months. I shed these items when it is hot to drop weight or free up space for other gear. I also keep warm weather items like a small hammock in my bag during the summer but swap out for a bivy sack and a sleeping mat for colder months. This process of seasonally reviewing your bug out bag will also help you review your items and make adjustments as you become more experienced with survival.
Tips When Building a Bug Out Bag
There are many factors to consider when building your bug out bag. However, there are a few that should constantly be on your mind. Here are some tips on getting it right:
- Always consider size and weight – With every single item you look at for your bug out bag, you need to be thinking about these metrics. An extra pound here are a few cubic inches there may not seem like much, but it adds up quickly. I mentioned knife sharpeners earlier. When searching online for knife sharpeners, there were high-quality items anywhere from three inches long and a few ounces up to a foot long and several pounds. After doing adequate research, I determined that the smallest option would do just fine in the field for sharpening a few blades. I ended up going with a small sharpener that could be attached to a keychain. It has two different stones and a sharpening rod for the gut hook on some of my knives. It has been perfect for my bug out bag.
- Consider the whole range of options and prices – There are some items in your pack that are easy decisions. For example, the effectiveness of water purification tablets is roughly the same no matter what you buy. Because of this, I can just find a cheap, small vial of tablets and know my water will be safe to drink.
On the other hand, when buying a survival knife there are dozens of different qualities of steel and even more choices for style, shape, and size. My first survival knife was rated well and was inexpensive, but the quality of the steel was poor. I tried out the knife after purchase and was not happy. When skinning a deer, it needed to be sharpened constantly. After weeks of additional research, I realized the problem and ended up spending about three times as much for a knife with higher-quality steel. I have only had to sharpen the second knife one time since purchase. Before making a purchase, consider all of the factors that could affect the value of the item.
- Focus on the pillars of survival – The four pillars of survival are food, water, fire, and shelter. These are the resources needed to survive for any significant period of time. The rule of threes further states that you can survival three weeks without food, three days without water, and three hours without warmth from fire or shelter. When you start building your bug out bag, these resources should be your top priorities. Before moving on to other items, you should know that you have these covered. That means your pack includes a way to feed yourself, a way to purify water, a way to start a fire, and a way to get shelter. Then you can move on to priorities like first aid, navigation, self-defense, and signaling for help.
- Try to choose long term solutions – This may be one of the toughest concepts to grasp for people new to this process. Let me break it down for you. When trying to provide food for yourself, your first instinct might be to just pack food. Maybe you want to pack some MRE’s, dry goods, or meal replacement bars. While you certainly can include these items, they will not last long. Since you must keep the weight of your pack down, you will likely be able to pack enough food to keep you nourished for a few days. However, if you pack items like a pocket fishing kit or wire for trapping small game, you could potentially feed yourself for weeks or even months.
The key to this decision process is being realistic about your abilities. Packing wire for snare traps does no good if you do not know how to properly set a snare trap. Packing a fishing kit is useless if you know nothing about fishing. This is where that survival knowledge I mentioned will come into play. If you know how to properly use these tools to supply yourself with food, you can reduce the size and weight of your pack and potentially survive longer in the wilderness. I did a ton of research on survival techniques before I even started building my bug out bag.
What is the Best Bug Out Bag?
While I would love to just give you the brand and model for the best bug out bag to purchase, it is not quite that simple. There are too many variables to consider. We have some suggestions, but you need to focus more on the features of the bags you are considering. Here are some details to think about:
- The durability of the bag should be one of your primary points of focus. Good stitching and thick material are vital. If you are hiking through the wilderness and your pack starts to come apart, you are pretty much stuck where you are. I have had my bug out bag for over 15 years and aside from replacing a plastic clip it is still in perfect condition. I have a second bag that I bought used from a military surplus store, and it is likely 30 plus years old going strong.
- Always go for waterproof if possible. There is going to be lots of gear in your pack that should not get wet from clothing to food to fire starting material. Many packs are completely waterproof. Mine comes with a waterproof cover tucked in a zipper pocket in the bottom.
- Make sure it fits you. Packs are not one size fits all despite what they may say. For an internal frame pack to fit properly, the majority of the weight should be on the waist belt on your hips. The shoulder straps should be somewhat loose with the connection to the pack resting at your shoulder blades. If it does not fit properly, it will greatly reduce your comfort when hiking. Most of these packs have several points for adjustments. Do not be afraid to ask an expert how to properly make those adjustments. This is where physically going into a store could be an advantage. I am over six feet tall, and the first pack I tried was not a good fit despite saying it could be adjusted for anyone.
- The more compartments the better. You will find that organization in your bug out bag is a huge priority. You will only have a few large items, and the rest can be organized in smaller pockets and compartments.
- Bite the bullet and spend the money. While I suggest being thrifty with all of your bug out bag items, there are some that justify spending more. Be assured, packs that are built to last will cost more. If it is the only pack you ever need to buy for a bug out bag, it is worth the cost.
Building a Bug Out Bag on a Budget
While building a good bug out bag can be expensive, it certainly does not have to be. Here are a few tips to help you save money:
- When possible, make supplies from found items or stuff around the house. You can go online and spend top dollar for everything you buy, but there are other options. For example, instead of buying waterproof tinder like Wetfire cubes you can just rub cotton balls in petroleum jelly. You will still get waterproof tinder that will take a spark and stay lit for a few minutes even in the wind and rain.
- You can also stuff dryer lint into a toilet paper roll or bring a bag of pencil shavings. Instead of buying hooks for your pocket fishing kit you can fashion hooks from soda tabs. Instead of buying wire for snare traps you can strip spare electrical wire you have around the house. Instead of buying a first aid kit you can make one with supplies in your medicine cabinet. There are dozens of ways you can DIY your BOB.
- Work your way up in quality and quantity. I know everyone wants an awesome bug out bag immediately, but that is not always feasible. You are better off to get a decent bug out bag and then improve it piece by piece when you can afford to. For example, you might want to include a pocket fishing rod in your bag that costs $35. Instead you can start with a pocket fishing kit costing a couple bucks and then upgrade later. You may want to keep a week of meal replacement bars in your bag for $50. Instead just start with a couple and work your way up.
- Always look for deals. Lots of companies that sell the gear you need will run specials. These could be random or could be on the big shopping days like black Friday or the day after Christmas. Often when an outdoor shop first opens, they will have sales to bring in new business. Keep an eye out for these. Never assume the price is about the same everywhere. This is a niche market and there are huge fluctuations in prices. Get creative on where you shop. There may only be a few actual outdoor shops in your area, but consider places like military surplus shops, medical supply companies, and hunting/fishing shops. Scour the internet for deals and don’t be afraid to consider used items on your local online marketplace
Organizing Your Bug Out Bag
Your two priorities for organizing your bug out bag are weight distribution and accessibility. For weight distribution, you want to have a good balance for hiking. This means that the left side of the pack weighs about the same as the right. You also want your heaviest items closest to your body.
For accessibility, think about when you will actually need to use each item. For example, I know I will use my water filter several times a day starting when I first wake up, so I keep that in an outside pocket or at the very top of my pack. Ideally, an item like this should be in a spot where you can get it without opening your main compartment.
Next, you have items that you will only use in an emergency. These items should also be easy to access as you could be injured or need them in a hurry. Your first aid kit and signaling mirror should also be in outside pockets if possible. Then you have items that you will use daily but not until you set up camp for the night.
Normally I do not start a fire until I set up camp, so my fire-starting gear will be in the middle of my pack. Finally, you have items that you will only use occasionally. I rarely will use my pocket fishing kit during the day while I hike, and rarely will I camp near an ideal body of water for fishing. This goes in the bottom of my pack.
There are lots of online tutorials about how to properly balance weight and accessibility if you want to get more detailed. However, the best way to figure out if you have it right is to try it out. Load up your pack and go hike for a couple days. You will find out quickly if you have your bug out bag organized properly.
Conclusion
I hope this bug out bag list gets the gears turning for the items that might work best for your needs. It can seem like a daunting task. How will you research, buy, and test out all of these different pieces of gear. The good news is that you have time. Remember that you are better off to have a few high-quality items than you would be with a big bug out bag full of junk. Every well-researched item you buy is going to make you a little bit more prepared than you were before you bought it.
You will never be ‘done’ with your bug out bag. If you do it right, it will continue to change and evolve as you change and evolve. Just be sure to prioritize your purchases. Start with the item you feel is most important to survive while bugging out.
Take your time to make your choice and be sure to try it out once purchased. Once you are happy, add it to your bug out bag and move on to the next item. Be careful about buying multiple items at once as the research and testing can get overwhelming.
And for God’s sake, never walk into an outdoor supply store if you do not have a shopping list based on your research. If you just walk in without a plan, you will likely walk out with a bunch of purchases you will regret.
I am going to drive this point home one more time… knowledge is everything. I studied for at least a year before I started building my bug out bag. I’m not saying you need to wait that long. You just need to know what you are buying, why you are buying it, and how to use it to save your life.
If you ever buy something and realize you don’t know those three things, you are doing it wrong. Take a step back and follow the process. I really wish someone would have slapped me around years ago and explained this. I would have saved a lot of time, money, and frustration.