Growing Food in Limited Spaces: Microgreens and Sprouts

We are a reader-supported website so some of our posts may contain affiliate links. Ineedthattoprep.com is a participant of the Amazon Services LLC Associates Program, an affiliate advertising program designed to provide a means for sites to earn advertising fees by advertising and linking to Amazon.com If you buy something through one of those links, you won’t pay a penny more, but we’ll get a small commission, which helps keep the lights on! Thank you for your support!​

Share on facebook
Facebook
Share on twitter
Twitter
Share on pinterest
Pinterest

Last Updated on May 6, 2023 by Lisa Vargas

I have always felt lucky because I grew up on a small farm and my family had land.  I currently live on a small plot of land (about 2.5 acres out in the country) where I can have chickens, a few cattle, goats, and my own garden but I forget that many people don’t have that luxury.  That’s exactly why I wanted to write this post about growing microgreens and sprouts.  

These tiny but mighty plants are the perfect solution for limited space gardening. With just a windowsill or small container, you can grow your own nutrient-rich microgreens and sprouts in the comfort of your own home.

But why bother with microgreens and sprouts? For starters, they’re super easy to grow and require very little space, making them perfect for urban dwellers and anyone with a small living space. Not only that, but they’re also incredibly healthy, with high levels of vitamins, minerals, and antioxidants, which can become important in a survival situation.

Today we will look at what are microgreens, how to grow them, and their benefits they can add to your daily nutrition.  Remember, all of these gardening tips are geared towards a SHTF situation, so growing microgreens could just save your life one day.  

Let’s dive in!

What Are Microgreens?

what are microgreens

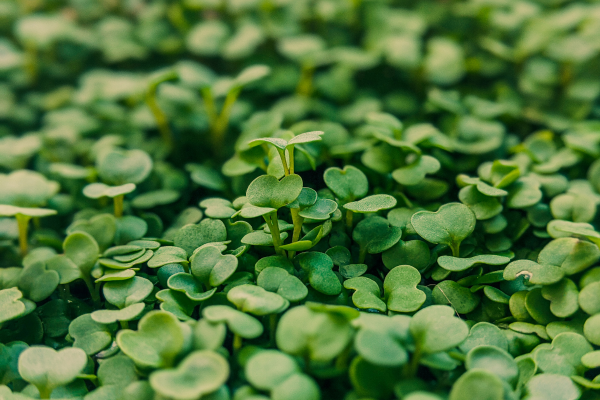
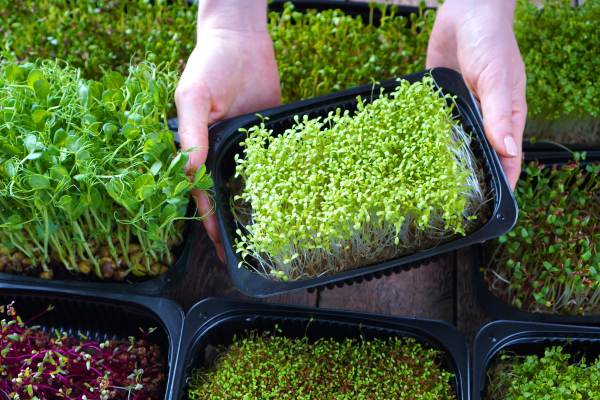
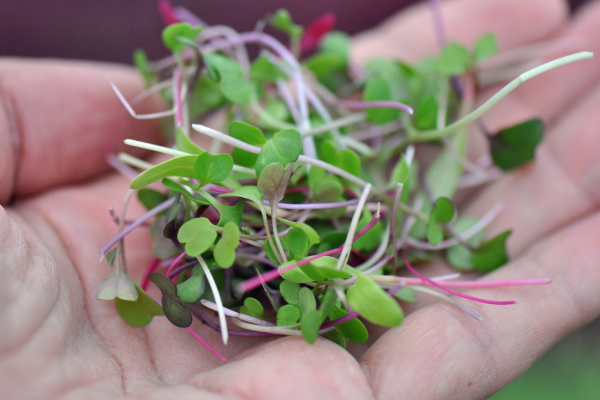
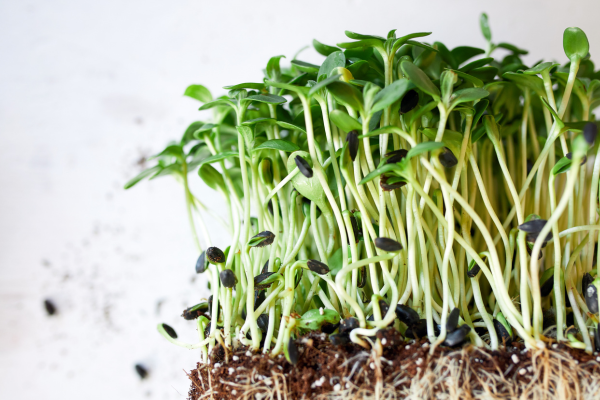
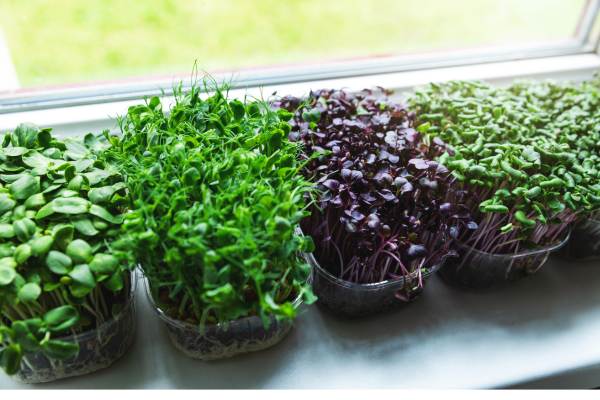
Microgreens and sprouts are two types of young plants that are commonly used in cooking and as garnishes. Microgreens are miniature versions of mature plants that are harvested when they are only a few inches tall and have developed their first set of true leaves. They are grown from a variety of seeds, including herbs, vegetables, and grains, and come in a wide range of colors, flavors, and textures. Common varieties of microgreens include arugula, radish, kale, and basil.

Sprouts, on the other hand, are plants that have just begun to grow from seeds. They are typically grown in water or moist soil and harvested when they are just a few days old, before they develop any true leaves. Common varieties of sprouts include alfalfa, mung beans, and broccoli.

Microgreens and sprouts are both extremely nutritious, with high levels of vitamins, minerals, and antioxidants. Because they are harvested so young, they are also very tender and have a delicate, fresh flavor.

Microgreens and sprouts are also incredibly easy to grow, even for those without a green thumb. They require very little space, soil, and water, and can be grown year-round, making them a great option for people who live in colder climates. Plus, because they grow so quickly, they can provide a steady supply of fresh and healthy produce with very little effort.

Why Grow Microgreens and Sprouts in Limited Spaces?

how to grow microgreens for survival

Growing your own food is one of the best survival skills you can learn. But what if you don’t have a backyard or a spacious balcony to grow a traditional garden? That’s where microgreens and sprouts come in. These tiny plants are perfect for limited space gardening, as they can be grown indoors in small containers or on a windowsill.

But why should you bother growing microgreens and sprouts in the first place? For starters, they’re incredibly nutritious. Sprouts are packed with vitamins, minerals, and antioxidants, making them super important if you are forced to live off the grid.

Microgreens and sprouts are also incredibly easy to grow, even for those without a green thumb. They require very little space, soil, and water, and can be grown year-round, making them a great option for those living in colder climates. Plus, they grow incredibly quickly—some varieties can be ready to harvest in just a few days.

Not only are microgreens and sprouts nutritious and easy to grow, but they’re also incredibly versatile.  All of these properties make them important for preppers who are trying to gain more skills to keep them alive during a SHTF scenario.

Quick Tutorial on How to Grow Microgreens

growing microgreens for survival garden

Let’s take a quick look at how you can started growing microgreens for your own survival garden project.

Step 1: Choose your container

Microgreens can be grown in a wide range of containers, including plastic trays, ceramic dishes, and old egg cartons. Simply make sure the container has drainage holes and is at least 2-3 inches deep to allow the seeds to grow.  Choosing plastic containers already  made for sprouts and microgreens is your best bet.

Step 2: Fill your container with soil

You can use potting soil or a soilless mix, such as coconut coir or vermiculite. Check that the soil is damp but not soaked, as this can cause the seeds to rot.

Step 3: Sprinkle your seeds evenly over the soil

Use about 1-3 tablespoons of seeds for a 10×10 inch container, or adjust the amount based on the size of your container. Make sure the seeds are evenly spaced to prevent overcrowding.

Step 4: Lightly water the seeds

Use a spray bottle to gently mist or water the seeds so that you don’t disturb them.  If you overwater them, it can cause the seeds to rot.

Step 5: Cover the container with a lid or plastic wrap

Covering the lid with plastic wrap will help retain moisture and create a greenhouse-like environment for the seeds to germinate. Alternatively, you can use a humidity dome or a clear plastic lid.

Step 6: Place the container in a warm and bright location

Microgreens prefer temperatures between 60-75°F and need at least 4-6 hours of direct sunlight or bright artificial light per day. You can place the container on a windowsill, under a grow light, or in a warm spot in your home.

Step 7: Check the soil moisture daily and water as needed

The soil should be moist but not soaked so that it gets waterlogged. Use a spray bottle or a watering can with a gentle stream to avoid disturbing the seeds. Try not to let the soil dry out because this can cause the microgreens to wilt.

Step 8: Place the container in a well-lit location

Once the microgreens have sprouted, remove the lid or plastic wrap and place the container in a well-lit location. Microgreens need plenty of light to grow, so make sure they have access to at least 4-6 hours of direct sunlight or bright artificial light per day.

Step 9: Monitor Growth

Continue to water the microgreens daily and monitor their growth. Microgreens grow quickly and should be ready to harvest in 7-14 days, depending on the variety. To harvest, simply snip the microgreens with scissors or a sharp knife, leaving about an inch of the stem behind.

Step 10: Rinse the microgreens and enjoy!

These micro greens are fantastic for your survival garden. Store any leftover microgreens in an airtight container in the fridge for up to a week.

Difference Between Growing Microgreens vs. Sprouts

how to grow sprouts for a survival garden

Growing sprouts is a little different than the above, but it still has a lot of overlap. Although both microgreens and sprouts are young plants that can be grown easily at home, there are some key differences between the two.

Growing Methods and Harvesting

The primary difference between microgreens and sprouts is how they are grown and harvested. Microgreens are grown in soil or a soilless mix and harvested when they have developed their first set of true leaves, usually taking 1-3 weeks. Sprouts, on the other hand, are typically grown in water or a moist medium like a jar or bag and are harvested just a few days after germination.

Flavor and Texture

Microgreens and sprouts also differ in their flavor and texture. Microgreens are more mature and have a more developed flavor than sprouts. They also have a thicker stem and more substantial leaves, making them a great addition to salads and sandwiches. Sprouts, on the other hand, have a delicate, fresh flavor and a crunchy texture, which makes them a great resource for adding some variety to your food during a crisis.

Nutrition

Both microgreens and sprouts are highly nutritious and packed with vitamins, minerals, and antioxidants. However, their nutrient profiles can vary depending on the variety and growing conditions. Microgreens tend to be slightly higher in nutrients like vitamin C and vitamin E, while sprouts are higher in enzymes and phytochemicals.

Growing Requirements

When it comes to growing microgreens and sprouts at home, both are relatively easy to grow and require very little space or equipment. However, their growing requirements can differ slightly. Microgreens require more attention to soil moisture and light conditions, while sprouts require frequent rinsing to prevent mold or bacterial growth.

Overall, both microgreens and sprouts are great options for adding fresh and nutritious produce to your diet. Whether you prefer the mature flavor and texture of microgreens or the delicate crunch of sprouts, you can easily grow them at home and enjoy the benefits of fresh and healthy produce all year round.

Benefits of Growing Microgreens During a Food Crisis

microgreens for survival garden

Microgreens can provide a variety of benefits for families during a disaster situation or food crisis. Here are a few ways microgreens can be particularly beneficial:

  1. Nutritional Value: Microgreens are packed with essential nutrients, vitamins, and minerals that can help keep you healthy and strong during a crisis. They can provide a source of fresh and nutrient-dense food when other sources may be limited or unavailable.
  2. Easy to Grow: Microgreens are easy to grow at home and require very little space or equipment. They can be grown indoors year-round, making them a reliable source of fresh food even during inclement weather or other crises.
  3. Quick to Grow: Microgreens are fast-growing and can be ready to harvest in as little as 7-14 days. This means you can have a steady supply of fresh produce without having to wait for months or even years for a garden to mature.
  4. Versatility: Microgreens can be used in a variety of dishes, from salads and sandwiches to soups and smoothies. They can add flavor, texture, and nutrition to any meal, making them a versatile and valuable addition to any emergency food supply.
  5. Cost-effective: Growing microgreens at home is an affordable and cost-effective way to provide fresh produce for your family during a crisis. With just a few dollars’ worth of seeds and minimal equipment, you can have a steady supply of fresh and nutritious food at your fingertips.

Final Thoughts

During a survival situation, nutrition is your first requirement. Microgreens and sprouts can be a vital piece of your survival garden planning.  They are easy to grow and don’t require you to have any land at all.  For more information on survival gardening visit the survival gardening category of my blog.