How Do You Make A Homemade First Aid Kit?

We are a reader-supported website so some of our posts may contain affiliate links. Ineedthattoprep.com is a participant of the Amazon Services LLC Associates Program, an affiliate advertising program designed to provide a means for sites to earn advertising fees by advertising and linking to Amazon.com If you buy something through one of those links, you won’t pay a penny more, but we’ll get a small commission, which helps keep the lights on! Thank you for your support!​

Share on facebook
Facebook
Share on twitter
Twitter
Share on pinterest
Pinterest

Last Updated on September 13, 2020 by

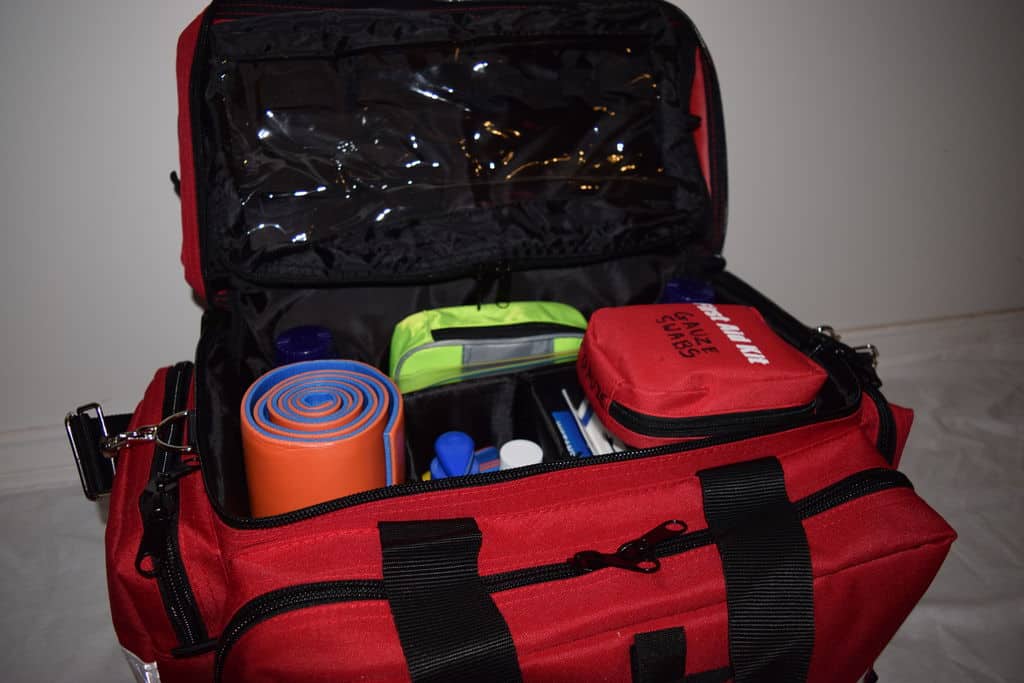
One of the most important aspects of survival when shtf is first aid.   You’ve probably seen several pre-made survival first aid kits online that you can purchase.  These are fantastic if you don’t feel like doing the research to determine what should go in those bags.

On the opposite end, if you feel more comfortable making your own homemade first aid kit, I can see why you would want to do that.  It allows you to customize every single piece of the first aid kit so that you get exactly what you want. 

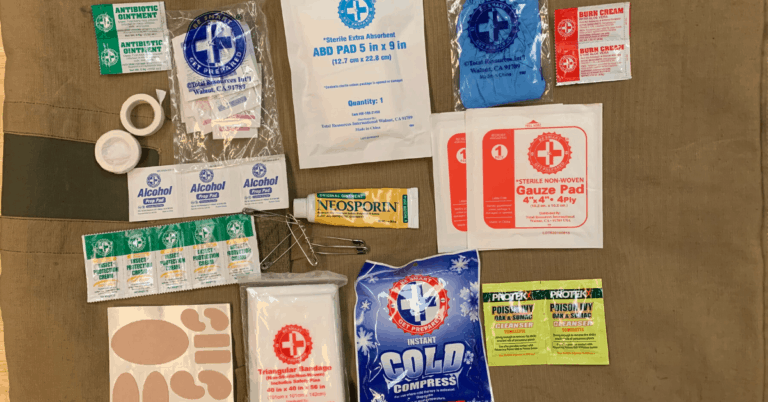
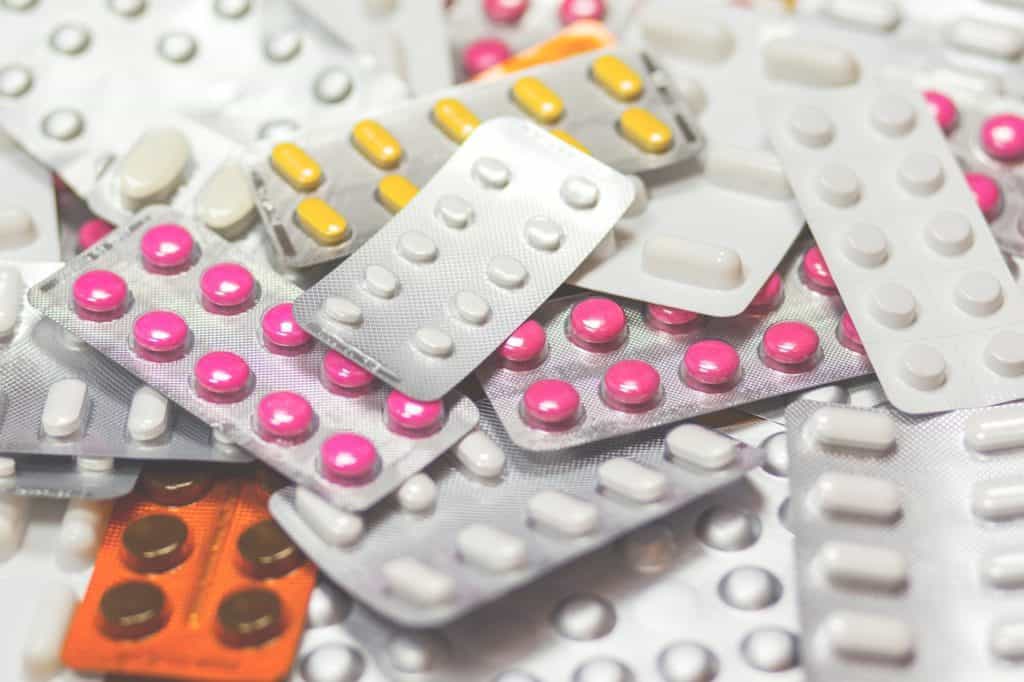
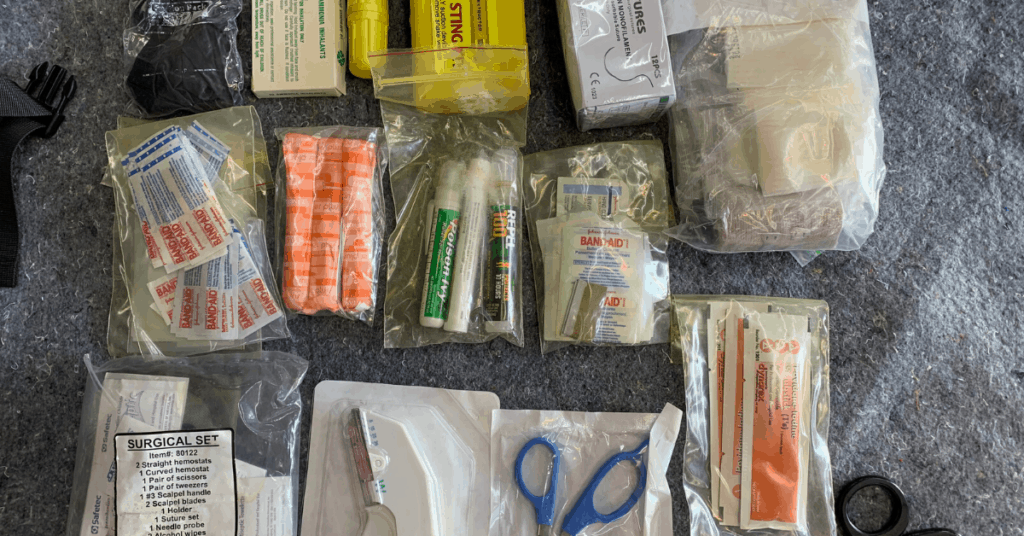
The important thing here is to make sure you have the essentials for this DIY first aid kit, along with the customized portions such as medications, medical devices, etc.  This will all depend on you and your family’s health and medical issues, if there are any.

And on top of that, if you have some training such as CPR or you want to get some training you can check the Red Cross for classes and training that they offer for becoming more knowledgeable in this subject matter.

Also remember that these items are the medical items I would use and I feel would be best to have in a homemade first aid kit.  There will be as many opinions on this subject matter as there are manufacturers of the medical products themselves!  

So with that said, I went ahead and did extensive research on the subject of how to build your own homemade first aid and wanted to share the concepts and information I found with you. So let’s go ahead and get started with finding out how to build your own homemade first aid kits!

How To Make A First Aid Kit

Below I have gathered a ton of information for you to help you put together your own first aid kit.  I’ve broken it down into various parts so that it makes it easier for you to gather items as you go.  Many of these items you can easily purchase through Amazon, so don’t worry about having a hard time finding them.  All of the gear you need will be available at your fingertips!

Choosing The Right First Aid Bag

One of the first things you are going to want to do is find a good, solid, durable bag that can be used to house all of your first aid gear.  You will also want to consider where you will be using this first aid kit. For example, if you’re backpacking out in nature, just taking a day trip, or planning to keep this at home or out on the road. 

You can easily go to a military surplus store, if you have one in your own town, or I’ve listed a few bags that I like that you can purchase on Amazon below: 

Unigear 600D Dry Bag Sack

The Unigear 600D Dry Bag Sack is a great bag for keeping the most important items in your homemade first aid kit water-proof.  Depending on how advanced you want your medical kit, will determine the size of the bag you need as well.

Tactical MOLLE Rip-Away EMT Medical First Aid Utility Pouch

One of my favorite first aid kit bags is this Tactical MOLLE Rip-Away EMT Medical First Aid Utility Pouch.  It’s built so that you can quickly remove it, plus it’s made from heavy-duty 600D polyester material.

MedPac 3800 Medical Bag

If you’re building a more advanced first aid kit to include more trauma supplies, you might be looking for something larger such as the MedPac 3800 Medical Bag.  It’s got really nice thick, padded insides to protect all of your first aid supplies.

Tactical Sling Bag Military Rover Shoulder Sling Backpack

If you like the sling-backs, this tactical sling bag by DIGBUG is a great choice for putting together a small everyday DIY first aid kit.  You might think this is small but I’ve got a friend who flew helicopters in the military and when he showed me his individual first aid kit (IFAK), I couldn’t believe how small it was and how much medical stuff fit in such a small space. 

First Aid Kit Box

You may also choose to use a first aid kit box instead of a bag.  A homemade first aid box may be useful assuming you will be leaving this kit at home.  If you are going on the road with the DIY first aid kit, you should go with a bag instead of a box.

Vintage First aid Box for Home

If you want to have the bright red colors, like the red cross, you should check out this Vintage First Aid Box for your home.  Metal is always durable and sturdy and it works well.

If you would like to go a little simpler with your homemade first aid kit box, you can get something like this MyGift First Aid Container Bin.   This little bin is made with durable plastic and measures approximately 13″ L X 9″ W X 8″ H.

First Aid Kit Checklist

make your own first aid kit

Standard Medical Tools

When you start building your first aid kit you will want to start with the basics.  The picture above comes from some of the basic first aid supplies I have in my homemade first aid kit. 

Let’s start with the some essentials first aid tools you will need in your kit.  These are tools that I’ve found to be in many of the first aid kits you can buy online.  I’ve also done some research on what EMT specialists would have in their basic tactical medical kits

Having medical-grade tweezers in your homemade first aid kit is important for getting out splinters, chars of glass, or any other foreign objects that may be in a wound.

Don’t use the cheap, two-dollar tweezers because they just aren’t the same. 

Remember the good old-fashioned thermometers that go under the tongue?  Well thanks to new technology, that isn’t necessary anymore with this SANPU digital infrared forehead and ear thermometer.

This digital thermometer is good for toddlers, kids, and adults alike.

Trauma sheers need to be a staple in your medical kit because they special types of scissors will help cut off large, thick bandages that have been placed over wounds.

Q-Tips

Q-tips are another one of those items that you should have in your homemade emergency medical kit.  They’re handy for cleaning wounds and applying ointments.

In your basic medical first aid kit, you are going to need to have a nice scalpel.  There are more advanced options of this, but for now we will focus on the basics.

Stethoscope

Your basic stethoscope will need to be in your homemade first aid kit.  Stethoscopes will range quite a bit in price, but don’t skimp if you want to have the best medical devices for your first aid kit.  You can take a look at the 3M Littmann Master Cardiology Stethoscope for a more advanced stethoscope.

Medications For Your First Aid Kit

Let’s move to medications for your DIY first aid kit.  This is important to make sure that you have enough for minor aches and pains.  You may find yourself doing more manual labor if you find yourself in a situation where there is no electricity, for example.  

Make sure to not forget about prescription medications.  This is going to be one of the toughest problems society will face if in the event of a major collapse.  Trying to stock up on medications is almost impossible because your doctor will only prescribe exactly what you need.  

I’m not sure what the answer is to this, since I don’t take any prescribed medications.  The best thing I would recommend is to do some research and find out as much as you can regarding the type of medications you are taking.  

Also take a look at this article from a Harvard Health study that discusses the expiration dates on prescription drugs.

Lotions and creams For Your DIY First Aid Kit

Don’t forget about medicated lotions and creams for the minor cuts and scrapes along the way.  You want to make sure you can cover all of your basis when it comes to the basics below. 

Wound And trauma kit Essentials

DIY first aid kit

In this section, I want to briefly touch upon the additional items you would need if you were going to build a more advanced trauma kit.  These tools are designed to stop bleeding or to seal off penetrating trauma.  

There’s a fantastic article you can read at www.ems1.com that covers what one former tactical paramedic had in his trauma bag. 

  • Nitrile gloves – You should always put these on before working on anyone. 
  • First aid manual (you may also want to pick up this popular bushcraft first-aid manual.
  • Irrigation syringe – Irrigation syringes are used for cleaning out wounds.
  • Hydrogen Peroxide – Hydrogen peroxide is a mild antiseptic used on the skin to prevent infection of minor cuts, scrapes, and burns
  • Sterile gauze pads – Sterile pads are used for many medical purposes, especially on open wounds, but non-sterile pads may be used for cushioning, cleaning, and absorbing areas less at risk of infection
  • Band-Aids (various sizes)
  • Safety pins
  • Eye shield or pads
  • Alcohol wipes – These are a must-have in any medical emergency kit as they are essential for cleaning wounds and keeping an area clean.
  • Ace Bandages 
  • Triangle bandages -A triangular bandage is used as an arm sling or as a pad to control bleeding. It may also be used to support or immobilize an injury to a bone or joint or as improvised padding over a painful injury. 
  • Tegaderm– Tegaderm is a transparent medical dressing manufactured by 3M.  Tegaderm transparent dressings can be used to cover and protect wounds and catheter sites. Advantages of Tegaderm include its breathability and conformation to the skin such that it adheres in places such as the fingers and toes.
  • Plastic ziploc bags
  • Butterfly closures 
  • Aluminum finger splint
  • Sam-splint – The SAM (structural aluminum malleable) splint is a compact, lightweight, highly versatile device designed for immobilizing bone and soft tissue injuries in emergency settings. It consists of a layer of . 016 inches (0.41 mm) strips of soft aluminum, with a polyethylene closed-cell foam coating.
  • Israeli bandage – The Emergency Bandage or Israeli bandage is a specially designed, first-aid device that is used to stop bleeding from hemorrhagic wounds caused by traumatic injuries in pre-hospital emergency situations.
  • Surgical mask 
  • Suture kit – Suture kits are designed to have everything you need in order to stitch up wounds.  There’s a nice in-depth article that attempts to show you the basics of using a suture kit.
  • Iodine
  • Tourniquet – A tourniquet is a device which applies pressure to a limb or extremity so as to limit – but not stop – the flow of blood.
  • Saline solution  – It’s used to clean wounds, clear sinuses, and treat dehydration. It can be applied topically or used intravenously
  • Eye-wash
  • Tampons – for plugging up bullet hole wounds (never thought of that right?!)
  • Cold Packs

Medical Supplies For Treating Blisters

The reason I put this in its own separate section is because even though a blister seems like a small thing to be concerned about, it can turn into a nasty infection that could eventually kill you if not treated quickly and properly.

  • Moleskins – Moleskin is designed to help soothe and protect the blister from getting any worse.  If you feel a blister coming on, you’ll be happy you have these in your first aid kit.
  • 2nd Skin Squares – Hypoallergenic, latex free, and non-medicated, these hydrogel squares can be used for scrapes, cuts and burns
  • Molefoam Pads –  Similar to moleskins, these are used for padding areas of your feet that you feel a blister may form. Thin design conforms to the foot and fits in all shoes.
  • First Aid Tape – You might need some tape for extra staying-power if you are doing a lot of walking.  You should always have first aid tape in your kit anyways.

Medical Kit Packing and Storing

Image Source: Instructables

When you are packing your homemade first aid kit, you will want to sort things into smaller compartments or bags, for example.  You can buy small kit bags such as these to put into your larger bag.  You then can use a large black marker to write on the outside of the smaller bag so you know what’s inside. 

Your trauma kit bag is going to be much bigger than a basic DIY first aid kit because it will hold a lot of other first aid items above and beyond your basics.  The trick is making sure the bag is organized and the first aid items are easy to get to. 

Most of the trauma bags will have outside pockets that you can can store various medical supplies. For example, you may break your trauma first aid kit like the video outline below.  It really depends on how you fell most comfortable.

Other Home-made Kit Items To Consider

Here are some other items to consider in your homemade first aid kit. Everyone is going to be a little different, so I wanted to make sure to include some other items that will be very useful. 

Final Thoughts

It doesn’t matter how advanced your homemade first aid kit is, if you don’t have the experience to use the items that are in your medical kit, why even put them in there in the first place.  You can always pick up some resources like this popular book called The Survival Medicine Handbook and keep it with you. Let me know what I’ve missed in this article.  What would you put in your DIY first aid kit in addition to this?  What do you think is a waste of space?