Top 5 Easiest Small Animal Traps to Build for Beginners

We are a reader-supported website so some of our posts may contain affiliate links. Ineedthattoprep.com is a participant of the Amazon Services LLC Associates Program, an affiliate advertising program designed to provide a means for sites to earn advertising fees by advertising and linking to Amazon.com If you buy something through one of those links, you won’t pay a penny more, but we’ll get a small commission, which helps keep the lights on! Thank you for your support!​

Share on facebook
Facebook
Share on twitter
Twitter
Share on pinterest
Pinterest

Last Updated on April 26, 2023 by Lisa Vargas

It happens every year.  Outdoor enthusiasts get lost in the wilderness and must stay alive until help hopefully comes.  Hunters stay out past dark trying to get a few more minutes of hunting time and get turned around. 

Campers get trapped in bad weather.  Hikers leave the trail for that perfect selfie and cannot find their way back.  Whatever the circumstance, getting lost in the wilderness is a bad situation.

When you find yourself in a survival scenario, you must stop and prioritize your activities.  You only have so much energy and so much daylight with which to work.  The four pillars of survival are food, water, fire and shelter. 

These are the resources on which you should focus your efforts.  However, you should prioritize even within these four pillars.  The rule of threes states that you can only survive three hours without warmth from fire or shelter, three days without water, and three weeks without food.

 So why would food matter if most people are rescued within a week or two?

Why Food?

Yes, you can survive three weeks without food.  Because of this, water, fire, and shelter should take priority.  However, long before you die from weeks of starvation you will be affected by hunger. 

When the body goes long periods of time without food, it literally starts to eat itself.  The body starts by burning fats which happens in the first few days.  This can cause weakness, dizziness, light headedness, and cramping. 

After several days have passed, the body starts to move on to other body tissue including muscle and internal organs.  This causes splitting headaches as the brain can actually shrink by about 30%. 

It also causes confusion, disorientation, and severe depression.  This condition can make it impossible to motivate yourself to stay alive. 

You also lose fine motor skills making it much easier to cut yourself or trip and fall.  At this point your entire body hurts and you just want to lie down and do nothing.

In a survival situation, food can help in three different ways.  The obvious benefit is that it can keep you from dying of starvation. 

However, it can also ward off all of these negative symptoms of starvation.  Eating periodically will make it easier to operate safely and to stay productive. 

You will need to utilize every hour of daylight you have to work on other survival tasks such as collecting water and firewood or working on your shelter.

Finally, even a small amount of food is a huge boost in morale.  It is amazing how just a few calories can make you feel like you accomplished something. 

Even if it does not provide a huge amount of nutrition, any amount of food will allow you to stop focusing on the hunger for a bit. 

Why Trap Small Game?

There are lots of ways to get food in the wilderness.  However, trapping is one of the most efficient ways to get the most important nutrients.  The easiest way to get food is foraging. 

This is the process of collecting berries, edible plants, mushrooms, or insects.  You are almost guaranteed to find food while foraging if you know what to look for, but these foods are lacking the nutrients you need. 

While they might fill your belly, what you need most in a survival scenario are fats and proteins.  It is very difficult to find these nutrients while foraging.

You might think hunting big game would be your best bet, but you would be wrong.  Hunting big game like deer or turkey with primitive weapons is very difficult. 

While you would bring home plenty of meat, your odds of success are very low and the number of calories you will expend is very high. 

It may look good in the movies or on your favorite survival show, but it is just not realistic.  Chances are you will just be more frustrated.

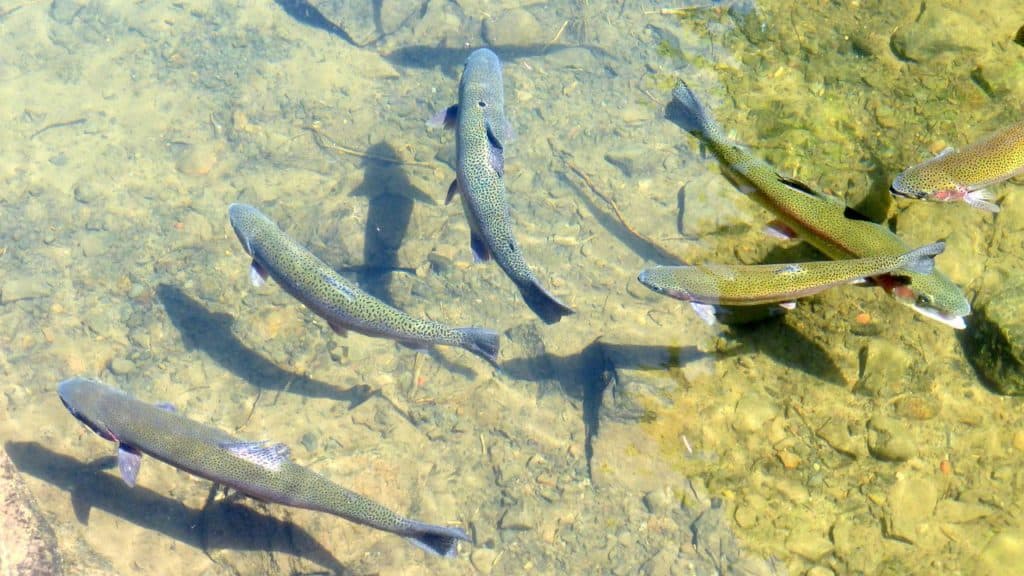
Fishing is a good option if you have a fishing kit, but again your odds of success are not great.  First, you need to find effective bait.  This alone might take several hours. 

If you find bait, you could use up all of your daylight casting a line and catch nothing.  Primitive fishing is hit or miss at best, and this is assuming you happen to have a fishing kit with you.

However, trapping places a check in very box.  When trapping small game or fish, you are providing yourself with plenty of fats and proteins. 

There is an abundance of small game in the forest, so you have a high rate of success.  Finally, trapping is incredibly efficient.  You can set your traps and then just check them once or twice a day.  In this article we will cover the right way to use primitive traps for small game and fish.

 We will also cover five of the easiest traps for you to learn for survival.

General Primitive Trapping Tips

There are a few key points to remember that apply to any primitive trapping:

Trapping Is A Numbers Game

On TV you might see a survivalist set one or two traps and then flash forward to collecting their catch. This is TV magic and rarely happens. 

One or two traps is better than nothing, but more is better.  In general, you need 20 or more quality traps to guarantee a daily meal.  This may seem overwhelming, but you can do four or five a day and will have a full trapping line in four or five days. 

Your odds will get better each day.  Just be sure to vary the locations, baits, and trap designs to give you the best chance of success.

Check Your Traps Regularly

You should be checking your trap line one or preferably two times a day. There are several reasons for this.  

Your meat could spoil, it could be eaten by other animals, or your prey could break free from your trap.  Animals are most active from just before sundown and just after sunrise.  

Because of this, the best times to check your traps are mid-morning and right before dark.

Camouflage Your Traps

Setting a good trap is not enough.  You need to make sure nothing about your trap scares away animals.  Use grasses or brush to hide the trap without blocking animals from moving towards it.  

Use soot, dirt, or evergreen needles to rub down before you set or check your traps.  This will help mask your smell. 

Set Traps Where You Know Animals Will Be

Randomly setting traps throughout the forest is rarely a good idea.  Look for signs that will tell you where the animals are active.  This could be scat, tracks, or game trails.  To take this a step further, use natural barriers to guide animals right into your trap.

Always Use Bait If Possible

Bait can be any food source you might be able to find.  It could be nuts, berries, fruit, edible greens, insects, or worms.  It can also be a small crumble of any food you happen to have with you.  

For scavengers or predators, you can use the entrails from other animals you have trapped. Be sure to place the bait in a spot where the animal will have to be caught in order to get to it.

How To Make A trap For Small Animals

Below you will five of the easiest small animal traps to make for beginners.  It may seem a little difficult at first, but like anything, practice makes perfect. 

1. Basic Snare

There are dozens of different trap designs you can learn as you develop your survival skills, but you need to understand the most basic designs first.  One of the fundamentals of many different designs is the basic snare. 

This trap design functions by tightening down on an animal’s neck or leg to hold it in place until you can come get it. 

To make a basic snare you will need some sort of cordage. Your best options are copper wire or paracord, but any cordage will do.  You can even make your own cordage with natural materials if needed. 

Make sure you give yourself a length of cordage long enough to create your loop and also attach your snare to something solid like a tree or a rock.  Start by folding over the end of the cordage and tying it with an overhand knot. 

This will create a solid loop at the end. Then simply feed the other end through the loop, and then you have your snare loop. 

Tie the other end of the cordage to something solid.  Then you need to place your snare in an ideal spot.  You might drape it over a branch and let it hang down to catch the neck of an animal. 

You can also prop it an inch or two off of the ground lying flat to catch the leg of an animal walking by.  Be sure to adjust the size of your loop to the size of the animal you are attempting to trap. 

2. squirrel Pole

small animal traps for beginners

Squirrels are abundant in almost every temperate forest, so they are an ideal target for trapping.  They have a tendency to take the path of least resistance.  With a squirrel pole, you are taking advantage of this tendency. 

You will need to start with a pole somewhere between four and five feet long.  It should be straight with no branches.  Wire or some sort of stiff cordage works best for this, but you can use sticks to hold up any kind of cordage. 

Prop the stick against a large tree trunk at a 45 degree angle.  This gives the squirrel an easier way to climb the tree versus starting at the bottom.  Try to pick an older tree with holes in it where squirrels might be nesting.  

You can also look for bundles of dry leaves in the upper branches that could be squirrel nests.  Once you have the pole in place, you will need several basic snares to attach to it.  I would suggest at least four or five, but you can attach as many as you like. 

Leave yourself enough slack so that you can place the loop of the snare vertically on top of the pole.  The loops should be just large enough for the head of a squirrel.  I usually make mine about two inches across. 

As the squirrel climbs the pole, the hope is that it will get stuck in one of the snares.  As the squirrel struggles, it will fall off of the pole.  This will keep it from freeing itself from the snare. 

3. Two-Stick Deadfall

A deadfall is a trap designed to crush the target animal.  To build this trap, you need to start with a large, flat rock.  It needs to be heavy enough to crush the primary small game in the area.  Next, you will need two sticks. 

One needs to be about twice the height of your target animal and straight.  It needs to be thick enough to support the weight of the rock. 

The other should be long enough to reach back in towards where the rock meets the ground and slightly curved.

Place your rock on a flat surface.  You either need to put it on a game trail or plan on using bait to lure in the animal.  Round off one end of the straight stick. 

For the curved stick, sharpen one end to a point and shave the other end flat. Place any bait on the sharp end.  Lift up your rock and place the flat side against it so that the stick curves to the back of the trap and slightly downward.

 Then put the rounded end of the stick against the other flat side of the curved stick so it is pinned against the rock while propping the rock up.  Your trap is now set. 

You want the curved stick, or bait stick, to be set so that any movement will kick out the support stick to make the trap fall.  Try tripping the bait stick a few times to make sure that it falls properly. 

4. Bottle Fish Trap

Fish are some of the hardest animals to actively catch, but some of the easiest to trap.  One of the most disappointing things I have seen on my survival experiences has been how much trash you find in what should be pristine wilderness. 

One of the most common types of trash you will find is plastic bottles, especially near water.  As frustrating as it is, this can make for a perfect fish trap.  Find the largest clear plastic bottle you can and pull off the label. 

Next, cut the tapered top of the bottle off leaving just the straight sided bottom. 

The next part can be tricky.  You want the opening to be just large enough for your target fish.  Get to a high overlook and try to see the size of the fish in the water.  Then cut around the opening to make it the appropriate size.

Take your modified top, flip it over, and shove it back into the base.  If you have cordage you can cut holes and tie the two pieces together to make it more secure.  You can also use a lighter to melt the two pieces together.

 Put your bait in the trap along with a few rocks to keep it on the bottom.  Place your trap facing upstream in moving water, or anywhere fish will be present in standing water. 

The fish will swim into the trap, but with the inverted opening they likely will not find their way back out.

5. M Fish Trap

This trap uses the same principle as the bottle trap, but on a much larger scale.  You need to find a part of the shoreline where the water is shallow, but still has fish present.  You need to find an area with lots of stones varying in size. 

Start laying out the largest rocks to make an ‘M’ shape with the base of it coming up to the shoreline.  Leave an opening at the cleave of the ‘M’ that is large enough to let in the fish you are trying to catch. 

Then use medium and small stones to fill in the gaps so that you have a solid wall.  Be sure that the only opening large enough for fish is the one you left initially. 

As with the bottle trap, the fish will swim in but will not be able to find their way out.  Bait the inside of your trap, but also place a little bait right at the opening. 

Once you have your fish in the trap, you will still need to get them to the shore.  You can try grabbing them with your hands, but this is quite difficult. 

Your best bet is to gather up a bunch of foliage or grasses and throw it on top of the fish. Then scoop up the entire bundle, fish and all, and throw it on the shore. 

These traps just scratch the surface of the different designs you can create, but they give you some of the most important principles of primitive trapping.  With this type of trapping, patience is important.  

You can see below in the video another form of fish trapping using rocks formed into different shapes.  Some of the best primitive survival fisherman are from other cultures.  The people who have been it this way for thousands of years!

There will be some trial and error to get your design right.  It is likely that the first few days you will find some traps where the prey got your bait but did not get caught. 

You might find traps where the animal was caught but broke free.  Make adjustments as needed and keep adding traps every day.  More is always better.

To give yourself the best chances of success, you should practice these trap designs in advance. When you go hunting, fishing, or camping, take the time to build a few traps. 

Go back the next day to see if you got any action.  Just be sure you take down your traps before you leave the area.  There is no point in leaving the trap set to harm animals that cannot be used for food. 

With enough practice, you will be much better prepared for scenarios in which you need success to survive.

Final Thoughts

For beginners, this article discussed some of the easiest small animal traps to make if you find yourself caught in a survival situation.  With some practice, the building of these traps can become second nature and can give you the peace of mind knowing that you have a much better chance of keeping yourself alive in the wilderness if something should go wrong.