Last Updated on April 26, 2023 by Lisa Vargas
If you are reading this article, you probably already read my general overview of survival shelters. That article gave you some general rules to follow for all survival shelters.
If you have not read the overview, I do suggest that you go back and read it at some point to give you a more comprehensive knowledge of shelter building. In this article, we are going to specifically cover how to build a lean-to shelter for survival.
In addition, we will go step-by-step through the process of building a lean-to for survival purposes.

Once we have finished, you will know everything you need to know to build one of the most useful and versatile shelter designs ever created.
Why a Lean-To Survival Shelter?
Lean-to shelters are one of my go-to designs when I need a shelter for the night or for several nights. There are several benefits to this design. Lean-to shelters are some of the fastest builds you will find.
With only natural materials, I have built a lean-to in as little as 20 minutes. Of course, the more time you spend building your shelter, the better it will work for you.
In addition, finding the materials you need for a lean-to is typically easy. I have completed roughly two dozen survival challenges and have probably built a lean-to on ¾ of those challenges.
All you need are poles and insulating materials such as leaves, grasses, or spruce boughs.
In addition, lean-to shelters can be adapted for several other designs. You can put two lean-to shelters next to each other to build an A-frame shelter. You can raise it up higher and put it above a platform for a raised shelter.
You can put several lean-tos inside a boma for a lean-to village. You can use wooden poles around the front and sides to make a lean-to cabin. You can drape clear plastic over the whole thing and make a Kochanski super shelter.
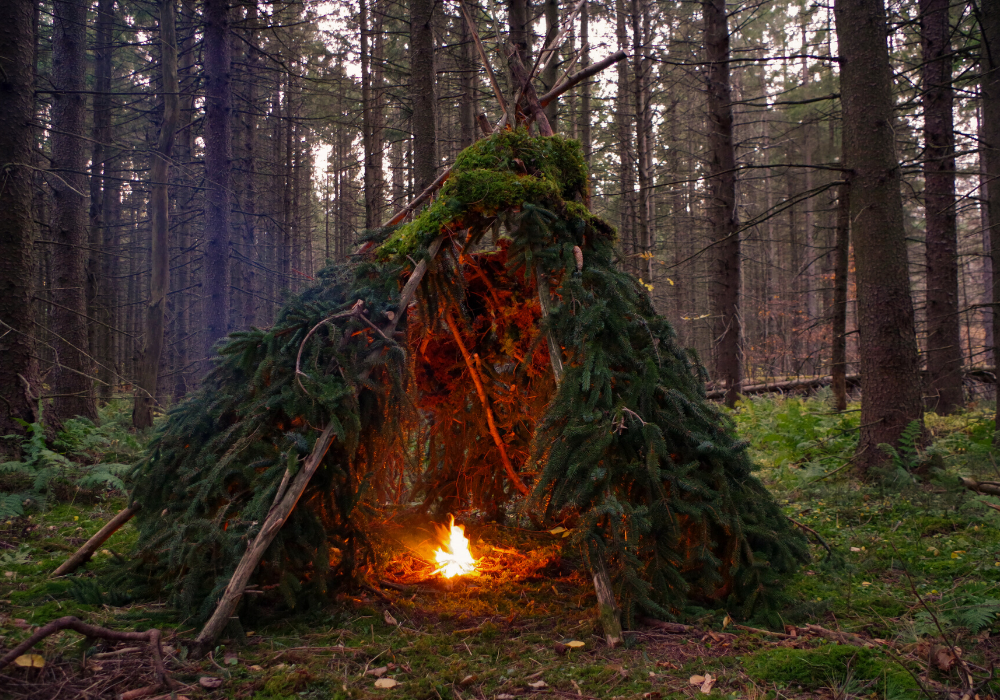
It is an excellent foundation for more complex options. Lean-to shelters block the wind, reflect heat from a fire, and keep you dry in the rain if built properly. In addition, it is one of the few shelter designs that is open making it perfect for building a fire right next to it.
You can enjoy the heat from the fire without worrying about smoke inhalation or the shelter catching fire.
How Do You Build A Lean-To Survival Shelter? – Getting Started

I am not going to go through all of the basic rules of building a shelter as our shelter overview article covered that, but I do want to focus on a few points. If you build a lean-to in the right spot with the right materials in the right way, it works very well.
However, there is definitely a wrong way to build a lean-to. On my very first survival challenge I expected a nasty storm the first night. I did a ton of research on how to make the lean-to waterproof so I would stay dry.
I knew I would be hypothermic if I got wet and the temperature dropped into the 50’s at night.
Unfortunately, I built the lean-to several feet off of the ground with the intention of weaving a hammock to sleep below the roof. I got the roof built but did not have time to build the hammock before the rain started.
The roof was 100% waterproof, but it was too far off of the ground and was facing the wrong direction. The heavy winds blew the rain right into the shelter and soaked me in the first five minutes.
The only thing that kept me from getting hypothermic was breaking out my survival blanket to stay warm.
To give you an example of a successful lean-to we need to discuss my knife-only challenge. A few years ago, I went out into the wilderness in April with only a knife and the clothes on my back.
There were heavy rains forecasted for all four days, and the weather did not disappoint. I threw together a lean-to in about 30 minutes with just natural materials and hunkered down for the rain. I was able to stay dry all four days despite heavy rains the whole time.
Let’s start with the location of your lean-to. You always want a lean-to on flat ground if possible. If you can find a rock face or big fallen log to build it against, that would help block the wind.
If not, you want to pay close attention to the prevailing winds. The roof should be built to block the prevailing winds, so the open side is opposite the wind. This will keep your shelter warmer and also prevent rain from blowing in if the winds are strong.
Your best option is to find two trees about eight to ten feet apart with branches about four to five feet off of the ground. You can then use these two trees as your vertical poles to support your ridge pole.
If you cannot find trees that will work, you will need to bury poles in the ground which is not as secure and requires more physical labor. Once you have a good spot, clear out any rocks or vegetation from the area where the shelter will be. This is going to be roughly an eight-foot by five-foot rectangle.
You will then need to get your building materials together. You will need a strong pole at least 10 feet long to serve as a ridge pole. Try to find strong dead wood so it is lighter and will not sag in the middle.
You will also need lots of poles about six to seven feet long to lean against the ridge pole. You want enough to put them side by side across the whole length of the pole.
Finally, you will need lots of insulating material. This could be dry leaves, dry grasses, or spruce boughs. In certain parts of the world, you can also use large leaves like banana leaves or large tropical fronds such as palm fronds.
The Build: How Do You Make A Lean To In The Woods?
The first thing you need to do is secure your ridge pole. If you have ideal trees with branches about four to five feet off of the ground, set the ridge pole in the crook of these branches.
If you need to break any of your dead wood to length, always put it between the trunks of two trees that are close together and push or pull to break it. Never stomp on it or break it over your knee as it could cause injury.
If you do not have trees for vertical poles, you will need to bury poles in the ground. You must dig post holes at least two feet deep and then insert vertical poles six to seven feet long with a Y at the top.
Next, fill in the dirt and pack it down around the poles. Set the ridge pole on top. If you have cordage you should lash the ridge pole in place to make sure it does not fall in the middle of the night.
This is more important for buried vertical poles than it is for a ridge pole resting on tree branches.
The next step is to lean all of the other poles at roughly a 45-degree angle against the ridge pole facing against the prevailing winds. Try to get them side by side for a more solid shelter and to ensure they do not shift in the wind.
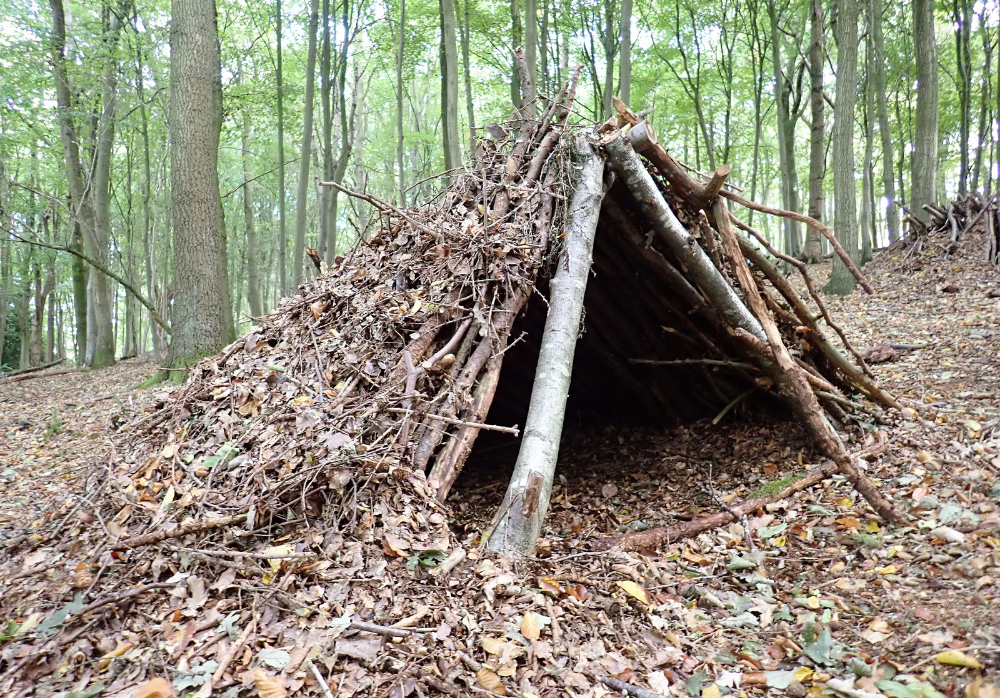
Once you have them all in place, start stacking insulating materials across the bottom and slowly work your way up to the top. Once the whole shelter is covered, start back at the bottom and build up another layer and so on.
If you just want to block the wind, two feet of insulation will probably do just fine. If you want to thoroughly insulate and make the shelter waterproof, you need at least four feet of insulation.
Finally, you need to have a bed in your lean-to shelter to keep your body off of the ground. As stated in the overview, lying directly on the ground will suck the warmth out of your body.
You can either build a raised bed, or you can pile up insulating materials. You need at least four inches of compacted insulation, so build up more than a foot and see how many inches of insulation you have once you lie on it.
Now your shelter is complete, and you can build a fire right next to it to keep you even warmer as the evening temperatures drop. You can also build a lean-to shelter with a tarp or emergency blanket, but we will cover that in a different article.
Final Thoughts
As always, the most important part of this learning process is practice. Just reading about how to build a lean-to shelter is not enough. Start by maybe building one in your back yard.
Then build one on a fishing trip or on a hike. Finally, build a lean-to in the wilderness and actually spend the night it in. All of this experience will help you make small adjustments to your design so that the shelter is a beneficial as possible.
It will also help you become more efficient with the building process. With this practice, you will know that you can quickly and effectively build a lean-to shelter in a survival scenario.